

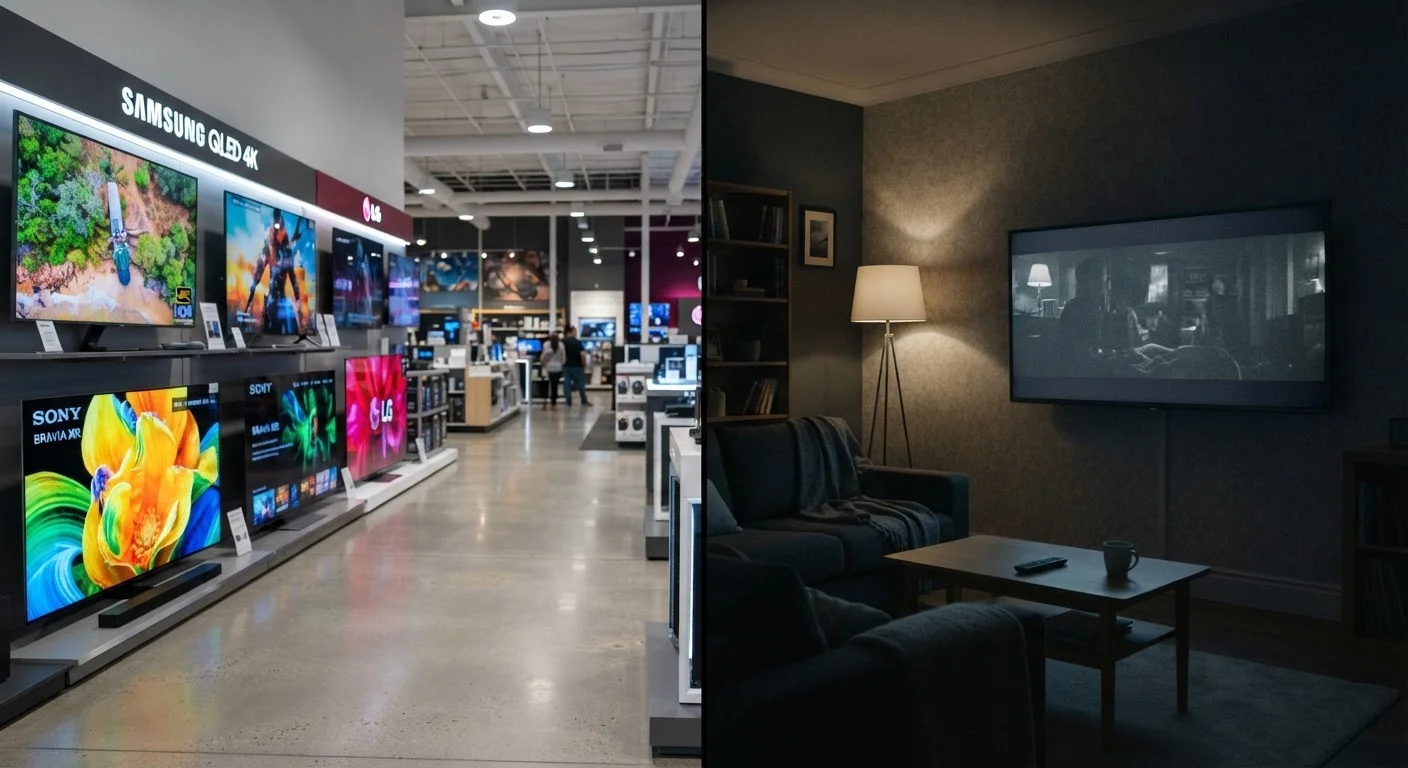
How the Showroom Is Designed to Impress
Walk into any major electronics retailer and you'll notice the same setup: banks of TVs running high-contrast demo reels under powerful overhead lighting, every unit dialed to maximum brightness and saturation. This environment is engineered - not accidentally flattering. Store lighting commonly exceeds 1,000 lux, roughly three to four times brighter than a typical living room.
That gap matters because a TV's perceived contrast and color depend heavily on surrounding light levels. A display that looks punchy and brilliant under store lights may appear washed out or overly dim at home, where ambient light is lower and more variable. If you're shopping for the first time, understanding these fundamentals before you walk in gives you a meaningful advantage.
Store Settings Are Not Your Home Settings
Most televisions ship from the factory in a 'Vivid' or 'Dynamic' mode specifically designed to attract attention under bright retail lighting. These modes push brightness and color saturation far beyond what looks natural in a typical home. If you bring home a TV without adjusting its picture mode, you may find colors look harsh and whites appear clinical rather than neutral.
Beyond lighting, retailers often stream pre-selected demo content - usually high-frame-rate nature footage or sports highlights - that makes motion and color look exceptional. The TV you take home will mostly play streaming video, cable, or gaming content, which rarely looks like a curated demo reel.
The Mistakes That Lead to Buyer's Remorse
Most TV disappointment at home traces back to a handful of predictable misjudgments made during the purchase process. They're easy to avoid once you know what's actually driving the in-store impression.
Judging picture quality solely by how vivid a TV looks in the store.
Why it happens: Showroom floors are extremely bright environments, and manufacturers default to 'Vivid' or 'Dynamic' picture modes that maximize visual punch under those conditions. Shoppers naturally respond to the most eye-catching display.
Ignoring backlight type and local dimming when comparing similarly priced models.
Why it happens: Resolution - specifically '4K' - dominates marketing language, so shoppers fixate on that number while overlooking how the TV controls light behind the panel. Two 4K TVs at the same price can produce dramatically different contrast.
Choosing a screen size based on how it looks on a large showroom floor rather than actual room dimensions.
Why it happens: Retail floors have high ceilings and open space that make even a 75-inch screen look proportionate. The same TV can feel overwhelming - or too distant - in a standard living room.
Assuming factory default settings will look good once the TV is home.
Why it happens: Most buyers unbox a TV, complete the setup wizard, and start watching without adjusting any picture settings. The default mode is optimized for retail visibility, not living room accuracy.
Treating the resolution number as the primary indicator of picture quality.
Why it happens: 4K (3840×2160 pixels) is a clear, easy-to-compare number, making it feel like a reliable quality proxy. In reality, panel type, processing, and content source often matter more.
Understanding spec sheet language is also part of avoiding these traps. Terms like 'local dimming,' 'color gamut,' and 'contrast ratio' sound technical but are genuinely useful once defined - the TV spec sheet glossary is a practical starting point.
Peak Brightness Claims Can Be Misleading
Manufacturers often publish peak brightness figures measured under very specific, short-duration test conditions - not during sustained real-world viewing. A TV marketed at 2,000 nits may sustain far less during a full movie or sporting event. See our deeper look at how brightness specs are measured for what to look for instead.
~300-500 nits
Typical sustained brightness in non-HDR home use
Industry testing consistently shows that many mid-range TVs sustain well below their advertised peak brightness during normal, prolonged viewing.
3-4x
Showroom ambient light vs. average living room
Retail display floors commonly measure 1,000 lux or more, while a typical home living room ranges between 100 and 300 lux depending on time of day and window placement.
What to Do When the TV Arrives Home
The first 30 minutes after setup significantly shape how much you'll enjoy a new display. Before judging image quality, switch away from the factory default picture mode and select the calibrated preset. Most modern TVs include a 'Filmmaker Mode' that disables artificial processing - like motion smoothing, which creates what's often called the soap opera effect - and renders content closer to what the director intended.
Next, run through a basic panel check. Confirm there are no dead pixels, examine uniformity by displaying a plain gray screen, and verify input lag is acceptable if gaming matters to you. A structured setup checklist helps ensure nothing is missed before the return window closes.
Finally, position the TV at the right height and distance for your room. Wall mounting changes the viewing angle and can affect perceived picture quality as much as any setting adjustment. Think through mounting decisions carefully before drilling.
The content on this site is for informational purposes only and is not a substitute for professional advice. Always consult a qualified professional for guidance specific to your situation.